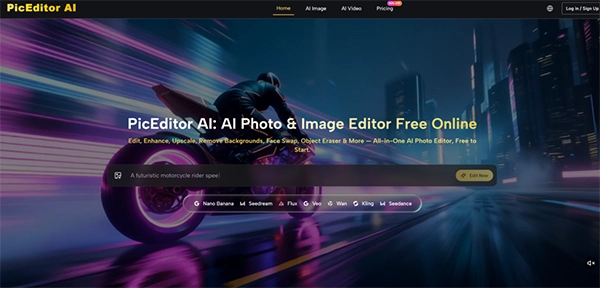
An AI photo editor is a tool that takes advantage of artificial intelligence to automate and complete editing tasks that otherwise take much time.
Creative work is what everyone wants. Still, most fail to achieve it, not because of a lack of ideas. Most of the time, it is because of the time that it takes to convert ideas into creative work. Between various repeats of the workflows and content creation of various platforms, traditional approaches can easily frustrate the process.
This is where AI Photo Editor gets the real value in the industry. They do not affect your creativity – they simply take out the struggling and time-consuming things in the process.
Keep reading to learn how these AI photo editors simplify the real-world creative process tasks.
Key Takeaways
- Modern AI photo editor tools help human editors to reduce the time consumption and improve accuracy.
- Learning some clear and specific AI prompts can help significantly improve editing and image quality.
- Human creativity can still not be replaced with any AI tools and plays a major role in getting precise results.
Speed alone rarely makes a favourable case for AI in creative work. What concerns you is whether the tool embraces your visual taste while improving the mundane. Across several tests, I verified that the editor’s tendency to accept reference images was the feature that kept the output closer to my original intent.
When I needed to create a series of product images with a consistent warm, editorial lighting style, I uploaded a single proof shot alongside the source photos. The AI derived the tone and shadow direction from the reference and carried it across the batch.
In previous experiences with generative fill tools, I had grown adaptable to wild variations in color temperature and mood, so this stability felt like a meaningful step forward. The trade-off is that the example system requires you to have a clear stylistic target before you start; it will not invent a uniform look from vague instructions.
The masking and inpainting functions further improved the balance between speed and control. I could roughly brush over a distracting element in a background, type a short description of what should replace it, and receive a result that blends reasonably well with the surrounding pixels.
On the first attempt, complex textures like foliage or patterned fabric sometimes showed slight repetition artifacts, but a second generation with a tiny adjusted prompt usually resolved them. What I noticed is that the tool calls for a small amount of patience, and in return, it removes the tedious cloning work that often eats into a designer’s afternoon.
One of the most practical perks I experienced was not needing to switch between different applications for different output types. The same browser tab let me enhance a static photograph, convert it into a stylized art work, and even generate a short animated clip from the image.
This multi-format capability is especially handy for content creators who need to produce hero images, social-media thumbnails, and short video loops from a single original asset.
The photo-to-video module gave me a few seconds of motion from stills, like a hot coffee cup or a windswept landscape. The motion felt more stable and conceptually accurate than the early-generation AI animations I had seen in consumer apps a year ago, though fast-moving edges or complex overlapping subjects still provoked visible warping.
This lines up with broader progress reported in diffusion-based video synthesis research, where short clips from static images have become ever more viable but still need careful source selection. My practical advice is that the feature works best when you treat it as a simple ambient loop rather than a dynamic action series; gentle motion in hair or water looks far more impressive than a sprinting figure.
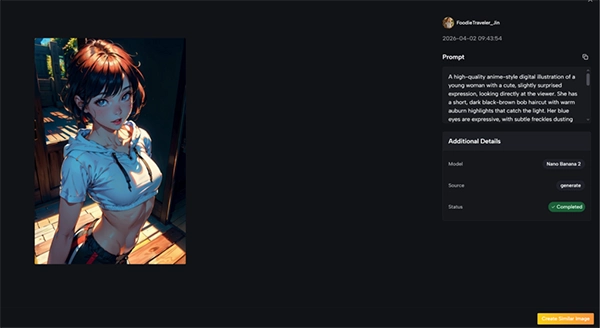
Working with generative AI shifts a segment of the craft from manual control to verbal description, and that shift comes with its own learning curve. In my sessions, the quality gap between a weak prompt and a well-structured one was stark.
A vague instruction like “make the background nicer” led to unforeseen, often unusable results, whereas a concrete phrase such as “replace the white wall with a sunlit brick texture, shallow depth of field” produced an edit that could pass a quick client test.
The platform does not attempt to hide this attachment behind a layer of automated guesswork. It presents a blank text field and trusts you to describe what you want. For users accustomed to slider-based interfaces, this can feel unpolished at first.
However, once I adapted to describing scenes in plain but clarified language, the editing process started to feel like directing an assistant rather than wrestling with a machine. I also noticed that limiting prompts to around five to ten words led to the highest success rate; excessively long listings sometimes introduced competing instructions that confused the model.
This reliance on human phrases means that the editor is not a crutch for someone who avoids creative decisions. It rewards those who already have a clear strategy but lack the hours to execute it pixel by pixel.
And because each regeneration uses credits, there is a gentle economic pressure to think before you prompt, which in turn sharpens your communication with the tool.
My workflow inside the editor settled into a simple three-stage rhythm that maps directly onto the platform’s display. The process is designed to keep you in control while letting the AI handle the work.
The foundation of any successful edit is a well-prepared starting file and a clearly specified edit area.
Starting with the highest practical resolution gave the AI algorithms more visual information to analyze. In my testing, low-light or heavily trimmed images occasionally caused the polish module to sharpen noise instead of genuine detail. A clean, properly disclosed source file routinely led to cleaner outputs, especially in tasks like style transfer where fine textures matter.
Painting a mask over the region you want to modify is very simple, but the real skill lies in pairing it with the right prompt. I found that making one change at a time produced the best results.
Asking the AI to remove an object, change the background, and adjust the lighting in a single prompt often led to conflicts. Isolating each edit into its own pass ensured quality and made it easier to trace what went wrong if a generation failed.
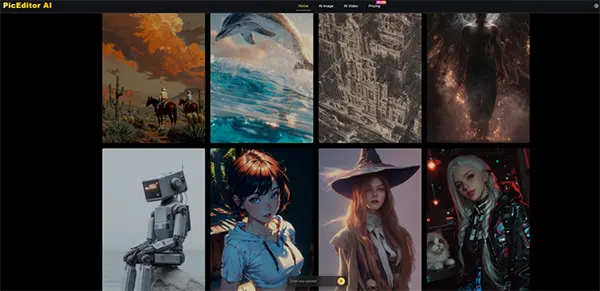
The model selection screen offers a menu of engines, each with its own visual style and credit cost.
Through trial and error, I learned to relate different models to different tasks. For high-fidelity object removal that needed precise texture blending, one model family delivered more reliable results. For expressive artistic variations where brushwork quality mattered, another series produced richer palettes.
The platform does not lock you into a single engine; you can run the same mask and prompt through various models to compare output. I suggest doing this on a single test image at the start of a project to see which model aligns with your taste before you process a large batch.
Every action erases a defined number of credits from your balance. Simple still-image edits generally cost less, while video generation and higher-fidelity models call for a larger credit investment.
The free trial tier gives you enough runway to run several experiments, which is perfect for building an intuitive sense of cost versus quality. For ongoing commercial work, the monthly plans make the math routine, but even on the free tier the transparent cost readout helps you avoid errors.
After each generation, the platform places the edited version side by side with the original, helping a quick quality check.
Even strong generations often contain small faults. I started to check for telltale signs like repeated texture patterns, faint halos around masked edges, or color shifts in shadows.
When I noted an issue, I would adjust the prompt slightly rather than hitting edits with the exact same wording. Small linguistic tweaks – “soft shadow” instead of “shadow,” or adding “natural light” – frequently solve the artifact on the next attempt. This iterative dance feels familiar to anyone who has ever modified layer masks or blend modes in a classic editor.
The download options include full-resolution formats meant for print or web. One component that sets this service apart from many AI image tools I have used is the definitive grant of full commercial rights on user-generated content.
For freelancers, small agencies, or e-commerce business owners, that simple fact removes the legal confusion that has made some generative AI outputs unsafe for client work.
The following table describes my hands-on observations with the primary model families found on the platform. These notes offer personal testing feedback rather than objective examples, and your mileage may vary largely on image content and prompt phrasing.
| Model Series | Strongest Task | Realism and Texture Quality | Approximate Credit Use | Notes from Personal Testing |
| Nano Banana | Artistic style transfer, detailed upscaling | Very high; produces organic brush textures and clean fine detail | Medium-high | My go-to for painterly portraits and preserving facial structure across styles |
| Flux Kontext | Object removal and background replacement | High; certain texture blending with minimal seams | Medium | Consistent performer for inpainting; handles fabric and foliage well |
| Seedream | Quick drafts and experimental concepts | Moderate; sufficient for mockups and social media previews | Low | Useful for rapid iteration when speed outweighs absolute polish |
| Veo | Photo-to-video animation | Good temporal coherence for gentle motion; struggles with fast action | High | Best for subtle ambient loops; requires careful source image selection |
This diversity of models means the editor is not a one-size-fits-all solution. It rewards the user who invests a small amount of time in learning which engine solves a specific visual problem. In that sense, the model menu becomes a stylistic palette rather than a technical burden.
A balanced assessment needs to recognize where the tool currently struggles. During my sessions, low-contrast source images caused the correction module to overwork, magnifying grain rather than enhancing detail.
The photo-to-video feature, while remarkable for subtle motion, does not yet manage complex camera movements or occlusions without visible warping. I also encountered a few instances where the AI interpreted a prompt in a technically correct but visually jarring way, such as making a new sky too saturated for the mood of the prior scene.
These are not adverse effects of the technology so much as reminders that the user must remain the final arbiter of taste. Each glitch I ran into could be fixed with better source preparation, more precise language, or an extra regeneration pass, but the process is clearly one of partnerships rather than automation.
Recognizing this early prevents discomfort and sets a realistic expectation: the tool improves your capabilities, but it does not replace your judgment.
The major difference is made when one takes advantage of the AI photo editing to improve their creativity process, not to replace it. When used the right way, it can significantly improve the tough workflows and remove the time-consuming parts, such as the removal of the background.
For designers, marketers and other professional this is not just an advantage but a partner who improves things on their behalf. Above this, the creators who learn to merge their skills with the better use of AI get the desired results.
An AI photo editor is a tool that takes advantage of artificial intelligence to automate and complete editing tasks that otherwise take much time.
No, AI tools are here to help human editors to perform tasks with more accuracy and in less time, not to replace anyone.
No, beginners can also take advantage of this just with an easy tutorial.